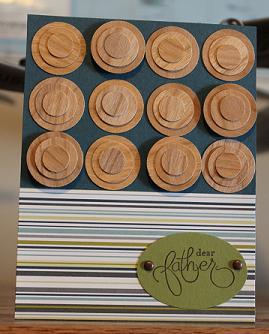
Monday, October 3, 2011

MFT guest designer


You can't win if you don't try...right.  When I saw this month's challenge to put together a pretty package my wheels started spinning.  I have fall on the brain wishing for cooler temps and watching football.  I had this pumpkin baby hat made for a local craft fair but no one bought it.  I think if it was packaged like this it would have sold for sure.  I LOVE this Li'l Pumpkin set from My Favorite Things.  In fact this was my first purchase from them.  She is colored with copics on vanilla cardstock.  Her outfit and pumpkin are paper pieced from the Spice Case DSP collection from SU.  The medallion on top is made with the die from MFT and accented with a SU button and twine.  I hand wrote "for your" then stamped the Li'L Pumpkin from the stamp set.  I always call my son "pumpkin" he wasn't born in October but thanks to a nice case of jaundice he was quite orange for a while.  Well I hope you get some inspiration from this or just a chuckle :).

Monday, August 1, 2011

MFTWSC30

My mom sent me this new MFT stamps so what better way to say thank you than to make her a card with it.  I've used the MFT sketch for this week.  I used some retired DSP (playdate) and took flower and color cues from it.  The rolled rose die is so much fun and I have the best luck using it with felt and the big fat glue dots.  Sudden thought...new movie...my big fat glue dot!  Seriously what can't you fix/do with a glue dot?  Keep checking back...I'll be starting a brand new blog soon!

Wednesday, June 15, 2011

The Secret Garden

This spring my family and I were invited to attend a garden tour at a home in a historic neighborhood in Atlanta.  My husband couldn't go but I was able to take my son and meet my folks there.  This is the first MDS page I've done in a while due to computer issues.  I hope my mom will like it enough to use it as her screen saver on their new laptop.  The idea/layout came from Heather Sumers.  The background is basic grey with lots of real size square punches filled with color and a variety of DSP in the colors old olive, pumpkin pie, so saffron, choc. chip and baja breeze.  A couple embellishments and the vintage vogue stamp set round it out.
Thanks for looking.

Tuesday, June 14, 2011

Dad-you're an ACE

As promised here is my Father's Day card for this year.  I was lazy and just made three of the same-or I could say...they're so cute why try anything else.  My color inspiration came from the DSP.  Out of a 12 x 12 sheet I tries to pick 3 planes with space to have the banner fly behind it.  After I cut these pieces I took my colors from the planes...a really interesting and nice combo of baja breeze and tangerine tango.  I used the MFT die fishtail banner https://www.mftstamps.com/home/homepage.html
The die cuts are strung on jillybean soup baker's twine.  I made a small cut using a box cutter knife right behind the tail of the plane to thread the twine through.  The word DAD is using the American crafts rub on Molly font....I picked that up at Hobby Lobby for 2.99 on clearance!
Hope you enjoy and get some inspiration from this.
Happy Stamping!

Monday, June 13, 2011

Well scripted Father's Day

This is the Father's Day card I made for my dad last year.  I do struggle with masculine cards.  Men just don't appreciate ribbon and buttons.  I had seen this concentric circle design on Mary Fish's blog (if you haven't seen her blog it is amazing...I'm totally jealous of her new stamp space and that she lives in Tucson, AZ).  Mary recommended a geometric pattern.  My dad has always been a great woodworker and when I saw these sheets of veneer in Archivers I knew I had to incorporate it somehow into his card.  Not too many other details to provide as it is an easy to follow design and layout but if you have any questions please let me know.
Stop by tomorrow and I'll show you this year's design.  I was lazy this year and made all three the same (DH, DF, and FIL)

Tuesday, May 17, 2011

Baby Onesie-Side step card

Sometimes the internet is fabulous.  I've been lucky enough to reconnect with some friends from high school-OK I'm not afraid to say it- class of 1991.  One friend I've reconnected with is my home room buddy.  She is presently expecting her fifth child.  Makes me sound like a slacker with only one.  I know she is a great mom so I wanted to make her a sweet card.  The inspiration comes from Jackie Topa's blog http://jackietopa.typepad.com/addicted_to_stamping/2010/07/side-step-dresser-tutorial.html
I added some elements I'd seen on other blogs.  The base is So Saffron with edges sponged in more mustard.  The stamp on the drawer fronts is from the SU set Noteworthy.  The DSP is old shades of spring.  The drawer pulls are gold nail head bling and the shelf is pearl bling.  I stamped the onesie from SU set A Slice of Life on the DSP and then onto the DSP Pawsitively Prints II (still available) to paper piece it.  I made the hanger with some beading wire and needle nose pliers.
The sentiment comes from teeny tiny wishes.  I wanted to add some more baby elements but didn't have anything to scale.  In the future I'll be on the lookout for items to add to the scene.  Thanks for looking.

Wednesday, May 4, 2011

Mother's Apron Strings

I saw this card (http://www.splitcoaststampers.com/gallery/photo/1948318) on SCS and was inspired to create this card and tutorial.  Sorry it's not much in advance of Mother's Day if you are sending a card but maybe if you are lucky enough to be with your mom you still have a few days to knock this one out.  It is really easy to do and you can adapt it to what supplies you have.  It would be really neat if you have an actual apron to match it to.
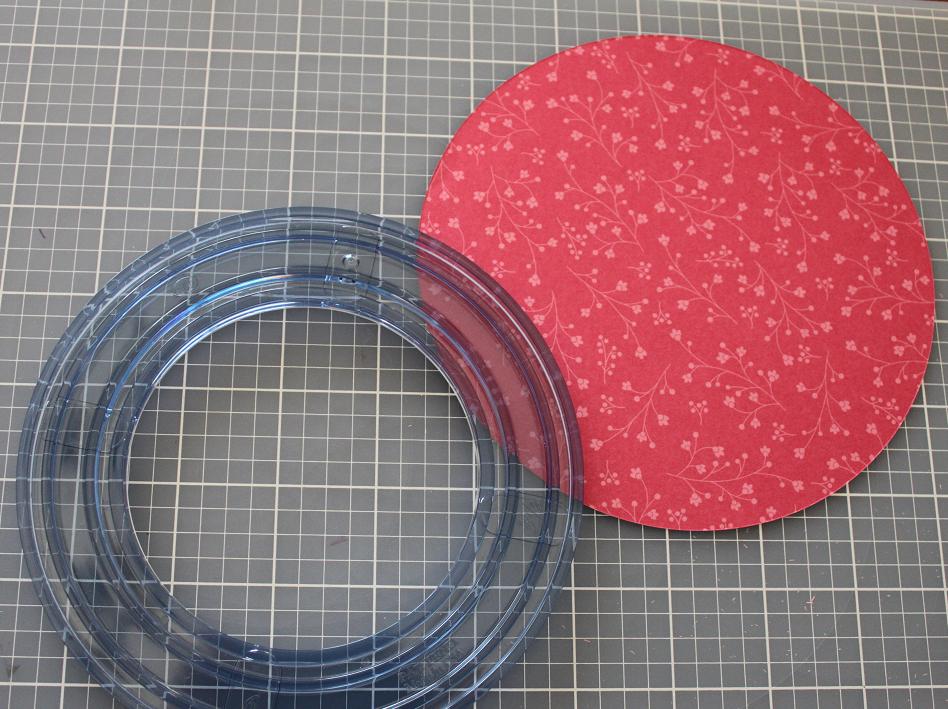
1. Cut a 6" circle out of DSP and cut the circle in half.
2. Make a mark 1 5/8" in on each side on the straight "top" of the apron.
3.  Fold at a slight angle out which makes the sides flare out of the apron.
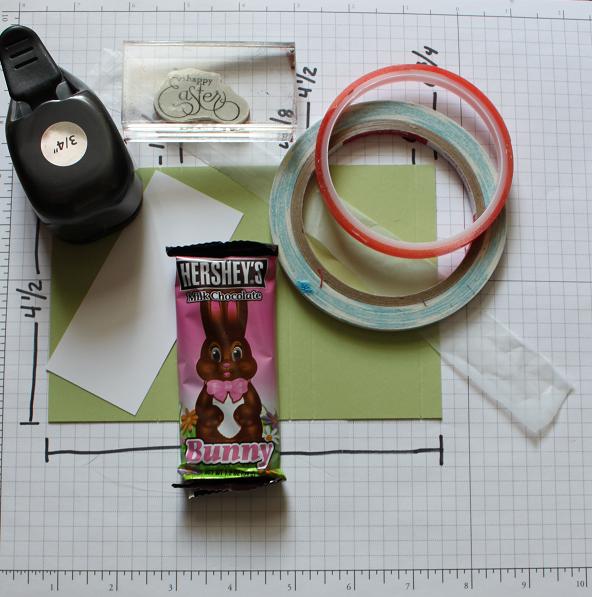
4. Cut a 1" strip of paper and use a border punch. (you could also scrunch some ribbon or tulle)
5.  Make a series of darts and adhere to the inside bottom of the apron.
6. Add two holes and eyelets at the top.  Add some ribbon and make a bow.
7. Add pockets to the front (these are from the heart trio punch)

I hope these directions and photos help.  If you have any questions just leave me a comment with your email so i can send a reply back.

I want to include also the Apron Poem.

THE PRINCIPAL USE OF GRANDMA'S APRON WAS TO PROTECT THE DRESS

UNDERNEATH, BUT ALONG WITH THAT, IT SERVED AS A POTHOLDER FOR
REMOVING HOT PANS FROM THE OVEN.
IT WAS WONDERFUL FOR DRYING CHILDREN'S TEARS, AND ON OCCASION
WAS EVEN USED FOR CLEANING OUT DIRTY EARS.
FROM THE CHICKEN COOP, THE APRON WAS USED FOR CARRYING EGGS,
FUSSY CHICKS, AND SOMETIMES HALF-HATCHED EGGS TO BE FINISHED
IN THE WARMING OVEN.
WHEN COMPANY CAME, THOSE APRONS WERE IDEAL HIDING PLACES FOR
SHY KIDS.
AND WHEN THE WEATHER WA COLD, GRANDMA WRAPPED IT AROUND HER
ARMS.
THOSE BIG OLD APRONS WIPED MANY A PERSPIRING BROW, BENT OVER
THE HOT WOOD-STOVE.
CHIPS AND KINDLING WOOD WERE BROUGHT INTO THE KITCHEN IN THAT
APRON.
FROM THE GARDEN, IT CARRIED ALL SORTS OF VEGETABLES. AFTER THE
PEAS HAD BEEN SHELLED, IT CARRIED OUT THE HULLS.
IN THE FALL, THE APRON WAS USED TO BRING IN APPLES THAT HAD
FALLEN FROM THE TREES.
WHEN UNEXPECTED COMPANY DROVE UP THE ROAD, IT WAS SURPRISING
HOW MUCH FURNITURE THAT OLD APRON COULD DUST IN A MATTER OF
SECONDS.
WHEN DINNER WAS READY, GRANDMA WALKED OUT ONTO THE PORCH,
WAVED HER APRON, AND THE MEN KNEW IT WAS TIE TO COME IN FROM
THE FIELDS TO DINNER.
IT WILL BE A LONG TIME BEFORE SOMEONE INVENTS SOMETHING THAT
WILL REPLACE THAT 'OLD-TIME APRON' THAT SERVED SO MANY WORTH-
WHILE PURPOSES.
REMEMBER:
GRANDMA USED TO SET HER HOT BAKED APPLE PIES ON THE WINDOW
SILL TO COOL.
HER GRANDDAUGHTERS SET THEIRS ON THE WINDOW SILL TO THAW.
THEY WOULD GO CRAZY NOW TRYING TO FIGURE OUT HOW MANY GERMS
WERE ON THAT APRON.
I DON'T THINK I EVER CAUGHT ANYTHING FROM AN APRON---EXCEPT LOVE.


Wednesday, April 27, 2011

Fly Away

Here's another non winning entry but one of my favorites.  A 5 x 5 card base of marina mist with a layer of baja breeze.  The bottom medallion is in so safron.  I hoped it would be the essence of a sunflower or the sun with butterflies emerging from it.  The butterflies are stamped and clear embossed onto pumpkin pie, old olive, baja breeze and chocolate chip.  They are matched to the same section of flower underneath.  They were attached with glue dots with the wings bent to give dimension.  Thanks for looking.

Tuesday, April 26, 2011

No Crown for me

Well I didn't win the Stamping Royalty contest...bummer.  Oh well you can't win if you don't try.  So to offset my loss I'll share my creations here with my loyal friends who will tell me how great the cards are and how I was totally robbed...hint hint....nudge nudge.  The first one I'll show is a thank you.  A pumpkin pie base with material girl DSP.  A variety of buttons using the My Favorite Things button die.  The stamp set is from Hero Arts.  I used a large circle punch to create a window in which I put a rub on I got in a pack from hobby Lobby on clearance.  Thanks for looking.

Sunday, April 3, 2011

Spring is Blooming

It's been a busy past 2 weeks here with almost no crafting (sigh).  In the past 2 weeks my parents house was struck by lightning, my son had his first ear infection, the dog had to have a emergency stitches, I fell at the grocery store and nearly broke my toe and then my son got chicken pox.  I promise people I could not possibly make this stuff up.  Idid have some time yesterday to throw together a card that is outside of my normal "style".  My Favorite Things has a design contest for "shabby chic".  To me that style is about LOTS of layers, patterns, texture, ribbon and embellishments.  I tired my best and will submit the entry but after looking at one entry I have almost given up hope.
This card is a color combo of river rock and rose red.  It uses a touch of pretty in pink.  The DSP is called sweet and sour (I just ordered a whole pack).  The MFT Pure Innocence stamp is so sweet.  I stamped her on whisper white, colored with copics and then distressed with tea stain ink.  The chipboard "e" is covered in Tim Holtz/Ranger distress crackle paint in the color "frayed burlap".  The ribbon at the top was an afterthought to bring more balance to the card.  I think it helps create a visual triangle to draw your eye around the whole card.  Well wish me luck....with the card and that next week will be better. 

Sunday, March 27, 2011

Blessings

Here is the latest project for the My Favorite Things weekly sketch challenge.  This is week 12.  This set is just as darling as all of the Pure Innocence ones are.  This card will be going to a friend of my mom who faithfully kept us on her prayer list as we were selling our last house.  I am so happy to say that a new family will be making our last house a home as of this last Thursday.  After over a year on the market and with the help of our wonderful real estate agent and a lot of prayers it is SOLD.  I think I will miss that house forever.  We had wonderful neighbors, my own craft room, and a view of farmland that was heaven. 
Well, now on to the card.  The base is old olive.  The DSP is a combination of American crafts everyday line and some SU.  the solid pink and blue are the reverse sides of the AC paper.  I stamped the little girl on whisper white and paper pieced her dress (soon regretted it too-next time plain colored dress).  She is colored in with copics and the grass is with copic marker free hand-saw the technique on a you tube video.
The flower and brad are both from SU.  The flowers are available on their clearance rack.  I've been hoarding 2 packages.  The flower got a little lost so I punched a flower out of old olive to mat it.
The ribbon at the top is also American crafts.  I just love when paper and ribbon from the same company go together.
Thanks so much for looking.

Saturday, March 26, 2011

They're Multiplying

Isn't that what rabbits do...well these guys are so much fun to make that 2 more popped up on my desk today.  One even volunteered to be the tutorial model.  I've taken several photos to lay out the instructions for you.  I hope they all make sense but feel free to let me know if you have any questions.  You'll need a piece of CS 6 3/4" by 4 1/2 ".  So you can get 2 out of one sheet of standard CS.  A word about measurements...DON'T BE SCARED.  Your trimmer has marks for 1/16, 1/8, 1/4 and 1/2 and all the combinations in between.  When I give you the score measurements I'm going to put in parentheses how I count to figure out the measurement.  If it helps each "panel" is 1 7/8 (one eighth less than 2) and each following score is 3/8" (if 2 eighths is one fourth than 3 eighths is one eighth more).
On the long side of your CS score at 1 7/8 the 2 1/4, 4 1/8, 4 1/2, 6 3/8 (one eighth less than 6 1/2) and 6 3/4....see not that bad.
You need to cut about a half inch wide by 10 inch long piece of plastic grocery bag.  This is the mechanism.
For more on this it is really helpful to watch Dawn's video.  Attach the strip ends to themselves ...here you'll see I used scor-tape but you can use red line tape as well.  This is on the first panel you scored.  The skinny last piece is on your right.  Punch half of a 3/4" punch in the middle panel to be a pull slot.
Attach the chocolate bunny to the far left panel.  Glue his "bottom" to the bottom. He should only be attached to the grocery bag.   Fold him over on his tummy and attach your message slider.  I used a piece of whisper white cut at 1 3/4 by 4".  Your message is important so attach it to the TOP (that's just a way to remember where to attach the bunny and the message).
Apply tape to the skinny last bit and make sure it cups over and around the message slider...I always wanted to be a hand model.  That's it....decorate the front and stamp your inside message.
I hope you enjoy this tutorial and I hope they bring joy to all who see them.


Friday, March 25, 2011

Herbert Nininger

OK...if you don't have a toddler or don't watch Curious George I'm sure the post title is a little strange.  A young man who is a friend of Curious George (the monkey) has lots of rabbits with very rabbit names...browny, spotty, cotton-tail and the last one named is Herbert Nininger.  Don't ask why..it's just silly.  I could have named this rabbit Kangaroo as that is the name of my son's immaginary pet rabbit.  It's so cute.

Anyway this rabbit comes from inspiration on SCS http://www.mercedesweber.blogspot.com/and Dawn Griffith http://www.dawnsstampingthoughts.net/.  I had to re-do the measurements of the slider to make it fit these smaller Hershey bunnie (got mine at Target).  I think I will make another one today with a different decoration on front (something more simple) and then post a tutorial tomorrow.  Thanks for looking and come back tomorrow for measurements.

Thursday, March 24, 2011

Fun Fold Tulip

I hope you can see the video below.  It is not of me but I found this video and had to do a card with the technique.  I think a video is the perfect way to explain how to make this card.  Reasons why this is a great design: 1) you can get 2 cards out of one sheet of 8. x 11. 2) you can use skinny scraps of DSP. 3) a fun fold that adds dimension without adding bulk 4) fits in a regular envelope 5) great for narrow or small main images.
The 2 step tulip stamp is the first thing I bought fell in love with from Stampin' Up.  This is stamped in Tangerine Tango and old olive.  The DSP is retired Haiku.  The butterflies are die cut from SU in so safron and the sentiment is a rub on from Archiver's.  This will go to a lovely lady who had invited my mom, dad, son and I to view over 5,000 tulips on a property near Atlanta.  I can't wait and hope for lovely weather and lots of great pictures.

Come back tomorrow for a SUPER cute Easter project that would be great table favors or class room gifts.

Fun Fold Card

Wednesday, March 23, 2011

Cupcake CASE

Do you know what a CASE is ....it's when you take someone else's art and make it your own.  It stands for Copy And Share Everything.  This great idea came from a card I saw on splitcoast http://www.splitcoaststampers.com/gallery/photo/1924128.  It was super fast and easy to put together.  The stamp set and matching punch are from SU.  The DSP is retired but any matching CS and DSP would make a great card.  This is my second choice for my mom to pick from for the April birthday girl.  Thanks for looking.  I am working on an Easter project today as well as a few Thank You cards.  Check back tomorrow to see what I get done (in between cleaning the floors).

Tuesday, March 22, 2011

Birthday Girl

Isn't she precious!  I have fallen in love with the Pure Innocence line of stamps from My Favorite Things.  When I first saw them I was hesitant to get them because I have a little boy.  But they were too cute to resist.
This is one of two cards I made for an April birthday girl.  I'm going to let my mom use one and I'll use the other...I wonder which one she'll pick.  This image was stamped, colored with copics and paper pieced with paper from a My Mind's Eye paper pack called Fine and Dandy...tickled pink.  The image is of a half ballon.  I punched a circle, inked the edges then added a high light with the white gel pen before covering the whole thing in versamark and clear EP.  I think it gives the little extra texture to the balloon.  I inked the edges of the main image in baja breeze.  Thanks for looking.  Come back tomorrow for the other card.

Monday, March 21, 2011

Under the weather?

It's spring and I feel great.  Definately not under the weather...unless you count pollen.  This is my latest entry in the MFT weekly sketch challenge.  As sson as I saw the sketch I knew I wanted to use one of my new sets (free for winning the week 5 challenge).  The backgound is some felt.  With the polka dots I felt (no pun intended) it looked like sky and rain.  The umbrella is SO cute in the pawsitively prints 2 DSP from SU.  In fact if SU sees this they might market an actual umbrella in the print (if only).
 I hope you can see from the picture the glossy accents used on her mack and wellies (pardon the spelling and UK terminology).  The cloud is punched with the fiskars cloud out of SU shimmer white.  The brads (hopefully looks like rain drops) are SU glimmer brads...gotta get more of them.  A little early for April Showers but maybe this will bring you a little spring weather wherever you are.

Thursday, March 17, 2011

Jar Full of Friendship

Check out what I got in the mail the other day.  I love it!  My sweet friend Jen used her brand new stash of sweet stitches fabric to make these jars.  She did such an awesome job.  I should have taken a picture of the inside because it is honestly as neat and cute as the top.  She gathered the material on the inside and covered the part where it all comes together with a scallop circle out of felt.
Now....hmmm....what should I put in them?  Buttons, ribbon, bobbins, pins..ahh the possibilities.
Thanks Jen..I'll always have these on my craft shelf and think of you when I see them.

Monday, March 14, 2011

MFT challenge week #10

Wow...10 of 52 weeks have passed.  Time flies!  This week's sketch was pretty easy to follow.  Not to worry, my supply of MFT stamps is about to increase by 3.  Back on week 5 I WON!  I was so excited to get the email.  I asked and they said even if you've won you can keep participating...plus it is a fun way to increase my card stash.
This week I used the my how you've grown set.  It is filled in with sweet and sour DSP and copic markers and SU daffodil delight marker for the baby's onsie.  The background paper is from the retired sweet pea pack.  I used the MFT scallop die twice for the vertical element and topped with a piece of pretty in pink ribbon.  The heart element is punched and then "inlaid embossed" with smaller melon mambo hearts.
Thanks for looking.  I'm over 3000 visitors which is amazing.  Have a great day crafting!

Thursday, March 10, 2011

Bright Flower blanket

This is for baby Kennedy who is scheduled to make her debut in a few short weeks.  I have been working on this blanket since September.  Why so long?  It's a good project to just do a few squares or should I say hexagons at a time.  Making the hexagons was easy but the sewing together took a while.  I made all of the large flowers as an anxiety aid as I watched the BCS National Championship game.  Most of the construction was done on a "vacation" week at my mom's.  The pattern did not call for a border but at the last minute I decided to add one.  I went around once in single crochet then again in half double crochet.  In the valleys I did an increase of 2 HDC and on the peaks I did 3 HDC increase.  The pattern is called Bright Flowers Throw on the lion brand website http://cache.lionbrand.com/.  I love the Vanna White yarn and the colors have such cute names: the white is lamb, the pink is pink poodle, the green is sweet pea and the orange is goldfish.  Thanks for looking.

Wednesday, March 9, 2011

triple tier aviary

I had seen a tutorial for this on Heather Summer's blog http://www.stampwithheather.typepad.com/ a while back but she did another for SCS a few weeks ago.  I decided to give it a try for a fellow blogger's b-day.
I really love chic-n-scratch's blog http://www.mychicnscratch.com/ and in honor of her bird theme pulled out some retired DSP and a current favorite SU set Aviary.  The tutorial is pretty easy but there is something wrong with the measurements of the second level so I has to kind of "wing it" (no birds were harmed in the typing of this pun).
I like the color combo of pacific point and old olive.  The ribbon I got off the SU clearance rack.  The button is also Stampin Up.  With more thought you could probably make one huge long bird cage on the card but I like the balance of having several. 
Thanks for stopping by.  Come back tomorrow for my latest crochet project....yes it is another baby blanket.

Tuesday, March 8, 2011

Hooty O'Brien

The newest star of late night TV...no.  But he is super cute with his orange vest.  In my family we always wear a touch of orange on the greenest day of the year.  Plus March 17 is a special day for us beyond St. Patrick's Day.  For us 3/17 is embryo transfer day.  Anyone with experience or knowledge of in-vitro fertilization will know what that means.  Four years ago on 3/17 our little guy started his 41 week "incarceration". 
For this card I used the color combo garden green and pumpkin pie.  The pumpkin pie DSP is from the sweet and sour pack and the garden green is from a hostess pack a while back.  The scallops were made with the MFT die. The shamrock was made from 3 of the small hearts from the trio punch.  I embossed the background with the swiss dot folder (just the upper half).  The pumpkin pie ribbon is retired but may still be on the SU clearance rack.  The sentiment is from teeny tiny wishes ties to the ribbon with twine.
Happy St Patricks Day.  Thanks for looking.  Come back tomorrow I have a triple tier card to show you.

Saturday, February 26, 2011

Greenhouse Gala meets Elegant lines

This card was inspired by a design on Splitcoast http://jentimko.stampincorner.com/2010/09/29/birthday-flowers/.  When I pulled out this DSP the other day to make the book mark card it seemed to hang out on my desk for a while longer.  The base is baja breeze and embossed with the elegant lines embossing folder from SU.  I added a small strip of pear pizzaz (trying to make my few sheets go as faaaaar as possible).  then I overlaid a scrap strip of choc chip stripe ribbon.  Yes I have a LOT of scraps.  I keep all my SU ribbon scraps in an old plastic jar.  It's amazing what you can do with an inch or two or three.  The flowers were "fussy cut" and popped up on dimensionals.  I added some chocolate pearls to the top and there you have it.
I think the only improvement would be to add some glimmer mist.  This is the perfect card for a birthday, thinking of you, get well or sympathy.  This one is a sympathy card for a co-worker from my days as an ortho nurse on the Gulf Coast.  Miss Anne will really be missed.

Friday, February 25, 2011

Friends are Flowers that never fade


Today I spoke with a "new friend" Dawn.  I've followed her blog for a long time and after talking on the phone with her she is exactly what I thought she would be...a sweetie!  Keeping with the girl scout song...."make new friends but keep the old...one is silver and the other gold".  Here is the latest project from my desk.  Last weekend we shopped at the mall and got a few freebies (w/ purchase) from Crabtree and Evelyn.  Of course I could just toss these at my friends and they would love them but why not dress them up a little. Start with a piece of CS 4 inches by 8 1/4.  Score at 2 3/4 then 2 3/4 from that score line.  Fold the third section in and make a mark 1 inch up from the bottom.  Draw a line from that point to the top right corner and cut that off.  Using scor tape or sticky strip along the bottom edge and the 1 inch edge.  Decorate the front as you like.  I've used the greenhouse gala DSP and used the friends never fade stamp embossed in white on pumpkin pie.  I put two pieces of sticky strip on the bottom and pleated a scrap of pumpkin pie ribbon.  I added 2 of the glimmer brads for interest.  I have been experimenting with off centered main images lately and really liking the results.  Come back tomorrow for another card!