

Wednesday, April 27, 2011
Fly Away

Tuesday, April 26, 2011
No Crown for me

Sunday, April 3, 2011
Spring is Blooming
It's been a busy past 2 weeks here with almost no crafting (sigh). In the past 2 weeks my parents house was struck by lightning, my son had his first ear infection, the dog had to have a emergency stitches, I fell at the grocery store and nearly broke my toe and then my son got chicken pox. I promise people I could not possibly make this stuff up. Idid have some time yesterday to throw together a card that is outside of my normal "style". My Favorite Things has a design contest for "shabby chic". To me that style is about LOTS of layers, patterns, texture, ribbon and embellishments. I tired my best and will submit the entry but after looking at one entry I have almost given up hope.
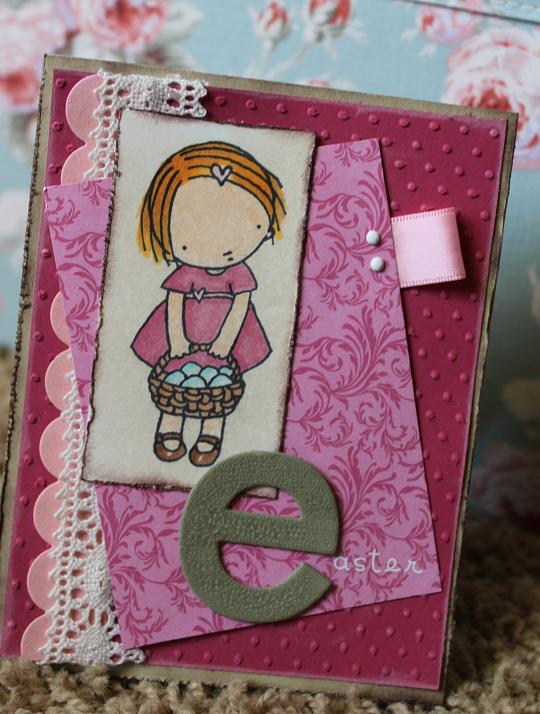
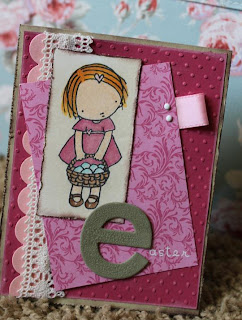 This card is a color combo of river rock and rose red. It uses a touch of pretty in pink. The DSP is called sweet and sour (I just ordered a whole pack). The MFT Pure Innocence stamp is so sweet. I stamped her on whisper white, colored with copics and then distressed with tea stain ink. The chipboard "e" is covered in Tim Holtz/Ranger distress crackle paint in the color "frayed burlap". The ribbon at the top was an afterthought to bring more balance to the card. I think it helps create a visual triangle to draw your eye around the whole card. Well wish me luck....with the card and that next week will be better.
Sunday, March 27, 2011
Blessings
Here is the latest project for the My Favorite Things weekly sketch challenge. This is week 12. This set is just as darling as all of the Pure Innocence ones are. This card will be going to a friend of my mom who faithfully kept us on her prayer list as we were selling our last house. I am so happy to say that a new family will be making our last house a home as of this last Thursday. After over a year on the market and with the help of our wonderful real estate agent and a lot of prayers it is SOLD. I think I will miss that house forever. We had wonderful neighbors, my own craft room, and a view of farmland that was heaven.
Well, now on to the card. The base is old olive. The DSP is a combination of American crafts everyday line and some SU. the solid pink and blue are the reverse sides of the AC paper. I stamped the little girl on whisper white and paper pieced her dress (soon regretted it too-next time plain colored dress). She is colored in with copics and the grass is with copic marker free hand-saw the technique on a you tube video.
The flower and brad are both from SU. The flowers are available on their clearance rack. I've been hoarding 2 packages. The flower got a little lost so I punched a flower out of old olive to mat it.
The ribbon at the top is also American crafts. I just love when paper and ribbon from the same company go together.
 Thanks so much for looking.
Well, now on to the card. The base is old olive. The DSP is a combination of American crafts everyday line and some SU. the solid pink and blue are the reverse sides of the AC paper. I stamped the little girl on whisper white and paper pieced her dress (soon regretted it too-next time plain colored dress). She is colored in with copics and the grass is with copic marker free hand-saw the technique on a you tube video.
The flower and brad are both from SU. The flowers are available on their clearance rack. I've been hoarding 2 packages. The flower got a little lost so I punched a flower out of old olive to mat it.
The ribbon at the top is also American crafts. I just love when paper and ribbon from the same company go together.

Saturday, March 26, 2011
They're Multiplying
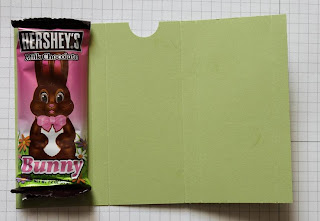
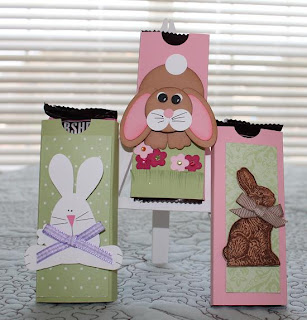
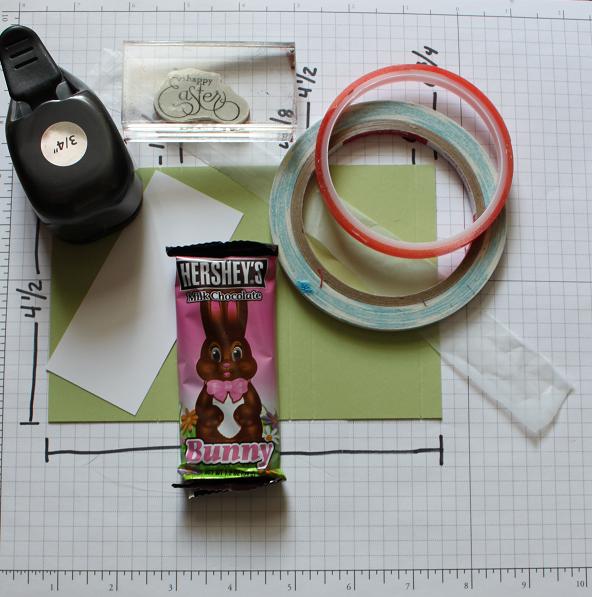
Isn't that what rabbits do...well these guys are so much fun to make that 2 more popped up on my desk today. One even volunteered to be the tutorial model. I've taken several photos to lay out the instructions for you. I hope they all make sense but feel free to let me know if you have any questions. You'll need a piece of CS 6 3/4" by 4 1/2 ". So you can get 2 out of one sheet of standard CS. A word about measurements...DON'T BE SCARED. Your trimmer has marks for 1/16, 1/8, 1/4 and 1/2 and all the combinations in between. When I give you the score measurements I'm going to put in parentheses how I count to figure out the measurement. If it helps each "panel" is 1 7/8 (one eighth less than 2) and each following score is 3/8" (if 2 eighths is one fourth than 3 eighths is one eighth more).
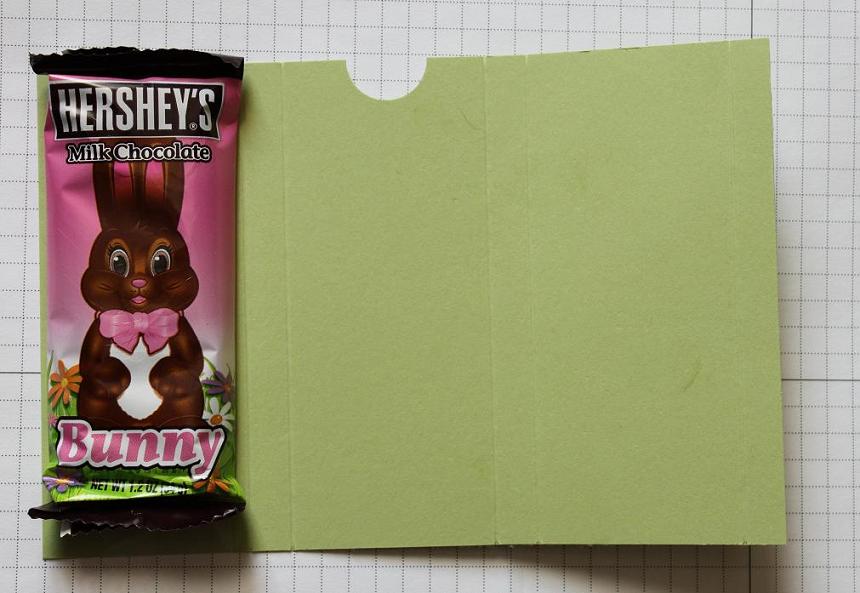
On the long side of your CS score at 1 7/8 the 2 1/4, 4 1/8, 4 1/2, 6 3/8 (one eighth less than 6 1/2) and 6 3/4....see not that bad.
You need to cut about a half inch wide by 10 inch long piece of plastic grocery bag. This is the mechanism.
For more on this it is really helpful to watch Dawn's video. Attach the strip ends to themselves ...here you'll see I used scor-tape but you can use red line tape as well. This is on the first panel you scored. The skinny last piece is on your right. Punch half of a 3/4" punch in the middle panel to be a pull slot.
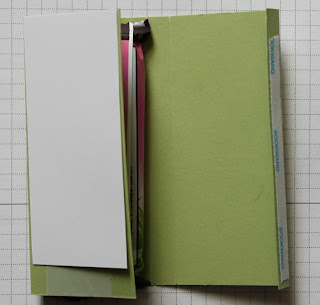
Attach the chocolate bunny to the far left panel. Glue his "bottom" to the bottom. He should only be attached to the grocery bag. Fold him over on his tummy and attach your message slider. I used a piece of whisper white cut at 1 3/4 by 4". Your message is important so attach it to the TOP (that's just a way to remember where to attach the bunny and the message).
Apply tape to the skinny last bit and make sure it cups over and around the message slider...I always wanted to be a hand model. That's it....decorate the front and stamp your inside message.
I hope you enjoy this tutorial and I hope they bring joy to all who see them.







On the long side of your CS score at 1 7/8 the 2 1/4, 4 1/8, 4 1/2, 6 3/8 (one eighth less than 6 1/2) and 6 3/4....see not that bad.
You need to cut about a half inch wide by 10 inch long piece of plastic grocery bag. This is the mechanism.
For more on this it is really helpful to watch Dawn's video. Attach the strip ends to themselves ...here you'll see I used scor-tape but you can use red line tape as well. This is on the first panel you scored. The skinny last piece is on your right. Punch half of a 3/4" punch in the middle panel to be a pull slot.
Attach the chocolate bunny to the far left panel. Glue his "bottom" to the bottom. He should only be attached to the grocery bag. Fold him over on his tummy and attach your message slider. I used a piece of whisper white cut at 1 3/4 by 4". Your message is important so attach it to the TOP (that's just a way to remember where to attach the bunny and the message).
Apply tape to the skinny last bit and make sure it cups over and around the message slider...I always wanted to be a hand model. That's it....decorate the front and stamp your inside message.
I hope you enjoy this tutorial and I hope they bring joy to all who see them.





Friday, March 25, 2011
Herbert Nininger
OK...if you don't have a toddler or don't watch Curious George I'm sure the post title is a little strange. A young man who is a friend of Curious George (the monkey) has lots of rabbits with very rabbit names...browny, spotty, cotton-tail and the last one named is Herbert Nininger. Don't ask why..it's just silly. I could have named this rabbit Kangaroo as that is the name of my son's immaginary pet rabbit. It's so cute.

 Anyway this rabbit comes from inspiration on SCS http://www.mercedesweber.blogspot.com/and Dawn Griffith http://www.dawnsstampingthoughts.net/. I had to re-do the measurements of the slider to make it fit these smaller Hershey bunnie (got mine at Target). I think I will make another one today with a different decoration on front (something more simple) and then post a tutorial tomorrow. Thanks for looking and come back tomorrow for measurements.


Thursday, March 24, 2011
Fun Fold Tulip
I hope you can see the video below. It is not of me but I found this video and had to do a card with the technique. I think a video is the perfect way to explain how to make this card. Reasons why this is a great design: 1) you can get 2 cards out of one sheet of 8. x 11. 2) you can use skinny scraps of DSP. 3) a fun fold that adds dimension without adding bulk 4) fits in a regular envelope 5) great for narrow or small main images.
The 2 step tulip stamp is the first thing I bought fell in love with from Stampin' Up. This is stamped in Tangerine Tango and old olive. The DSP is retired Haiku. The butterflies are die cut from SU in so safron and the sentiment is a rub on from Archiver's. This will go to a lovely lady who had invited my mom, dad, son and I to view over 5,000 tulips on a property near Atlanta. I can't wait and hope for lovely weather and lots of great pictures.

 Come back tomorrow for a SUPER cute Easter project that would be great table favors or class room gifts.
The 2 step tulip stamp is the first thing I


Subscribe to:
Posts (Atom)