Sometimes the internet is fabulous. I've been lucky enough to reconnect with some friends from high school-OK I'm not afraid to say it- class of 1991. One friend I've reconnected with is my home room buddy. She is presently expecting her fifth child. Makes me sound like a slacker with only one. I know she is a great mom so I wanted to make her a sweet card. The inspiration comes from Jackie Topa's blog http://jackietopa.typepad.com/addicted_to_stamping/2010/07/side-step-dresser-tutorial.html
I added some elements I'd seen on other blogs. The base is So Saffron with edges sponged in more mustard. The stamp on the drawer fronts is from the SU set Noteworthy. The DSP is old shades of spring. The drawer pulls are gold nail head bling and the shelf is pearl bling. I stamped the onesie from SU set A Slice of Life on the DSP and then onto the DSP Pawsitively Prints II (still available) to paper piece it. I made the hanger with some beading wire and needle nose pliers.
The sentiment comes from teeny tiny wishes. I wanted to add some more baby elements but didn't have anything to scale. In the future I'll be on the lookout for items to add to the scene. Thanks for looking.
Tuesday, May 17, 2011
Wednesday, May 4, 2011
Mother's Apron Strings
I saw this card (http://www.splitcoaststampers.com/gallery/photo/1948318) on SCS and was inspired to create this card and tutorial. Sorry it's not much in advance of Mother's Day if you are sending a card but maybe if you are lucky enough to be with your mom you still have a few days to knock this one out. It is really easy to do and you can adapt it to what supplies you have. It would be really neat if you have an actual apron to match it to.
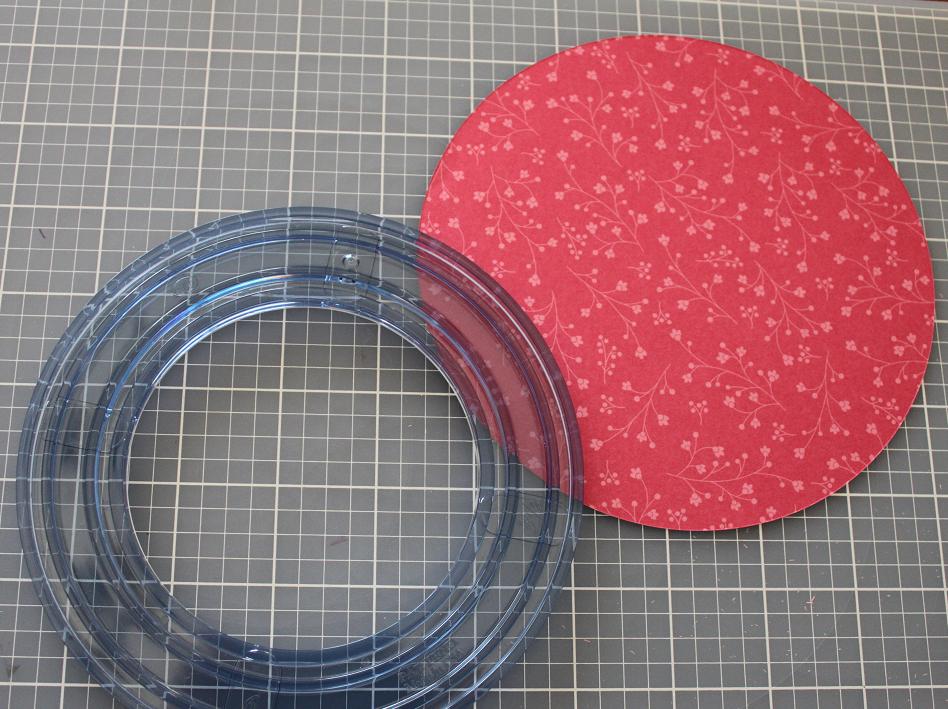
1. Cut a 6" circle out of DSP and cut the circle in half.
2. Make a mark 1 5/8" in on each side on the straight "top" of the apron.
3. Fold at a slight angle out which makes the sides flare out of the apron.
4. Cut a 1" strip of paper and use a border punch. (you could also scrunch some ribbon or tulle)
5. Make a series of darts and adhere to the inside bottom of the apron.
6. Add two holes and eyelets at the top. Add some ribbon and make a bow.
7. Add pockets to the front (these are from the heart trio punch)
I hope these directions and photos help. If you have any questions just leave me a comment with your email so i can send a reply back.
I want to include also the Apron Poem.
THE PRINCIPAL USE OF GRANDMA'S APRON WAS TO PROTECT THE DRESS
UNDERNEATH, BUT ALONG WITH THAT, IT SERVED AS A POTHOLDER FOR
REMOVING HOT PANS FROM THE OVEN.
IT WAS WONDERFUL FOR DRYING CHILDREN'S TEARS, AND ON OCCASION
WAS EVEN USED FOR CLEANING OUT DIRTY EARS.
FROM THE CHICKEN COOP, THE APRON WAS USED FOR CARRYING EGGS,
FUSSY CHICKS, AND SOMETIMES HALF-HATCHED EGGS TO BE FINISHED
IN THE WARMING OVEN.
WHEN COMPANY CAME, THOSE APRONS WERE IDEAL HIDING PLACES FOR
SHY KIDS.
AND WHEN THE WEATHER WA COLD, GRANDMA WRAPPED IT AROUND HER
ARMS.
THOSE BIG OLD APRONS WIPED MANY A PERSPIRING BROW, BENT OVER
THE HOT WOOD-STOVE.
CHIPS AND KINDLING WOOD WERE BROUGHT INTO THE KITCHEN IN THAT
APRON.
FROM THE GARDEN, IT CARRIED ALL SORTS OF VEGETABLES. AFTER THE
PEAS HAD BEEN SHELLED, IT CARRIED OUT THE HULLS.
IN THE FALL, THE APRON WAS USED TO BRING IN APPLES THAT HAD
FALLEN FROM THE TREES.
WHEN UNEXPECTED COMPANY DROVE UP THE ROAD, IT WAS SURPRISING
HOW MUCH FURNITURE THAT OLD APRON COULD DUST IN A MATTER OF
SECONDS.
WHEN DINNER WAS READY, GRANDMA WALKED OUT ONTO THE PORCH,
WAVED HER APRON, AND THE MEN KNEW IT WAS TIE TO COME IN FROM
THE FIELDS TO DINNER.
IT WILL BE A LONG TIME BEFORE SOMEONE INVENTS SOMETHING THAT
WILL REPLACE THAT 'OLD-TIME APRON' THAT SERVED SO MANY WORTH-
WHILE PURPOSES.
REMEMBER:
GRANDMA USED TO SET HER HOT BAKED APPLE PIES ON THE WINDOW
SILL TO COOL.
HER GRANDDAUGHTERS SET THEIRS ON THE WINDOW SILL TO THAW.
THEY WOULD GO CRAZY NOW TRYING TO FIGURE OUT HOW MANY GERMS
WERE ON THAT APRON.
I DON'T THINK I EVER CAUGHT ANYTHING FROM AN APRON---EXCEPT LOVE.
1. Cut a 6" circle out of DSP and cut the circle in half.
2. Make a mark 1 5/8" in on each side on the straight "top" of the apron.
3. Fold at a slight angle out which makes the sides flare out of the apron.
4. Cut a 1" strip of paper and use a border punch. (you could also scrunch some ribbon or tulle)
5. Make a series of darts and adhere to the inside bottom of the apron.
6. Add two holes and eyelets at the top. Add some ribbon and make a bow.
7. Add pockets to the front (these are from the heart trio punch)
I hope these directions and photos help. If you have any questions just leave me a comment with your email so i can send a reply back.
I want to include also the Apron Poem.
THE PRINCIPAL USE OF GRANDMA'S APRON WAS TO PROTECT THE DRESS
UNDERNEATH, BUT ALONG WITH THAT, IT SERVED AS A POTHOLDER FOR
REMOVING HOT PANS FROM THE OVEN.
IT WAS WONDERFUL FOR DRYING CHILDREN'S TEARS, AND ON OCCASION
WAS EVEN USED FOR CLEANING OUT DIRTY EARS.
FROM THE CHICKEN COOP, THE APRON WAS USED FOR CARRYING EGGS,
FUSSY CHICKS, AND SOMETIMES HALF-HATCHED EGGS TO BE FINISHED
IN THE WARMING OVEN.
WHEN COMPANY CAME, THOSE APRONS WERE IDEAL HIDING PLACES FOR
SHY KIDS.
AND WHEN THE WEATHER WA COLD, GRANDMA WRAPPED IT AROUND HER
ARMS.
THOSE BIG OLD APRONS WIPED MANY A PERSPIRING BROW, BENT OVER
THE HOT WOOD-STOVE.
CHIPS AND KINDLING WOOD WERE BROUGHT INTO THE KITCHEN IN THAT
APRON.
FROM THE GARDEN, IT CARRIED ALL SORTS OF VEGETABLES. AFTER THE
PEAS HAD BEEN SHELLED, IT CARRIED OUT THE HULLS.
IN THE FALL, THE APRON WAS USED TO BRING IN APPLES THAT HAD
FALLEN FROM THE TREES.
WHEN UNEXPECTED COMPANY DROVE UP THE ROAD, IT WAS SURPRISING
HOW MUCH FURNITURE THAT OLD APRON COULD DUST IN A MATTER OF
SECONDS.
WHEN DINNER WAS READY, GRANDMA WALKED OUT ONTO THE PORCH,
WAVED HER APRON, AND THE MEN KNEW IT WAS TIE TO COME IN FROM
THE FIELDS TO DINNER.
IT WILL BE A LONG TIME BEFORE SOMEONE INVENTS SOMETHING THAT
WILL REPLACE THAT 'OLD-TIME APRON' THAT SERVED SO MANY WORTH-
WHILE PURPOSES.
REMEMBER:
GRANDMA USED TO SET HER HOT BAKED APPLE PIES ON THE WINDOW
SILL TO COOL.
HER GRANDDAUGHTERS SET THEIRS ON THE WINDOW SILL TO THAW.
THEY WOULD GO CRAZY NOW TRYING TO FIGURE OUT HOW MANY GERMS
WERE ON THAT APRON.
I DON'T THINK I EVER CAUGHT ANYTHING FROM AN APRON---EXCEPT LOVE.
Wednesday, April 27, 2011
Fly Away
Here's another non winning entry but one of my favorites. A 5 x 5 card base of marina mist with a layer of baja breeze. The bottom medallion is in so safron. I hoped it would be the essence of a sunflower or the sun with butterflies emerging from it. The butterflies are stamped and clear embossed onto pumpkin pie, old olive, baja breeze and chocolate chip. They are matched to the same section of flower underneath. They were attached with glue dots with the wings bent to give dimension. Thanks for looking.
Tuesday, April 26, 2011
No Crown for me
Well I didn't win the Stamping Royalty contest...bummer. Oh well you can't win if you don't try. So to offset my loss I'll share my creations here with my loyal friends who will tell me how great the cards are and how I was totally robbed...hint hint....nudge nudge. The first one I'll show is a thank you. A pumpkin pie base with material girl DSP. A variety of buttons using the My Favorite Things button die. The stamp set is from Hero Arts. I used a large circle punch to create a window in which I put a rub on I got in a pack from hobby Lobby on clearance. Thanks for looking.
Sunday, April 3, 2011
Spring is Blooming
It's been a busy past 2 weeks here with almost no crafting (sigh). In the past 2 weeks my parents house was struck by lightning, my son had his first ear infection, the dog had to have a emergency stitches, I fell at the grocery store and nearly broke my toe and then my son got chicken pox. I promise people I could not possibly make this stuff up. Idid have some time yesterday to throw together a card that is outside of my normal "style". My Favorite Things has a design contest for "shabby chic". To me that style is about LOTS of layers, patterns, texture, ribbon and embellishments. I tired my best and will submit the entry but after looking at one entry I have almost given up hope.
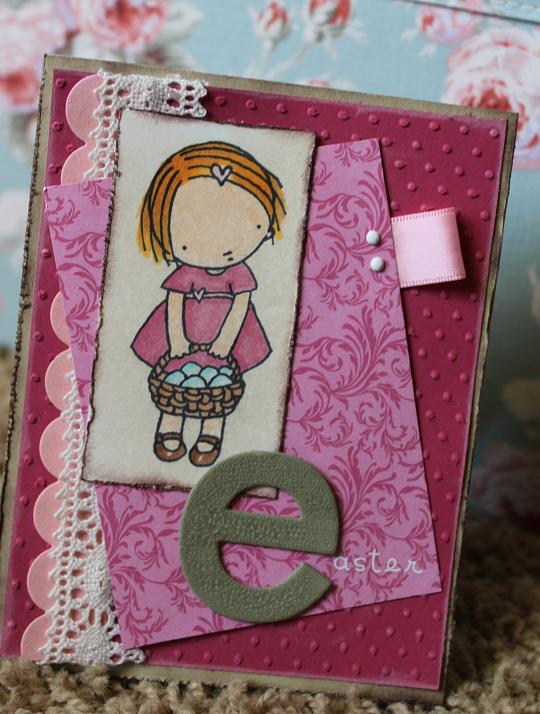
This card is a color combo of river rock and rose red. It uses a touch of pretty in pink. The DSP is called sweet and sour (I just ordered a whole pack). The MFT Pure Innocence stamp is so sweet. I stamped her on whisper white, colored with copics and then distressed with tea stain ink. The chipboard "e" is covered in Tim Holtz/Ranger distress crackle paint in the color "frayed burlap". The ribbon at the top was an afterthought to bring more balance to the card. I think it helps create a visual triangle to draw your eye around the whole card. Well wish me luck....with the card and that next week will be better.
Sunday, March 27, 2011
Blessings
Here is the latest project for the My Favorite Things weekly sketch challenge. This is week 12. This set is just as darling as all of the Pure Innocence ones are. This card will be going to a friend of my mom who faithfully kept us on her prayer list as we were selling our last house. I am so happy to say that a new family will be making our last house a home as of this last Thursday. After over a year on the market and with the help of our wonderful real estate agent and a lot of prayers it is SOLD. I think I will miss that house forever. We had wonderful neighbors, my own craft room, and a view of farmland that was heaven.
Well, now on to the card. The base is old olive. The DSP is a combination of American crafts everyday line and some SU. the solid pink and blue are the reverse sides of the AC paper. I stamped the little girl on whisper white and paper pieced her dress (soon regretted it too-next time plain colored dress). She is colored in with copics and the grass is with copic marker free hand-saw the technique on a you tube video.
The flower and brad are both from SU. The flowers are available on their clearance rack. I've been hoarding 2 packages. The flower got a little lost so I punched a flower out of old olive to mat it.
The ribbon at the top is also American crafts. I just love when paper and ribbon from the same company go together.
Thanks so much for looking.
Well, now on to the card. The base is old olive. The DSP is a combination of American crafts everyday line and some SU. the solid pink and blue are the reverse sides of the AC paper. I stamped the little girl on whisper white and paper pieced her dress (soon regretted it too-next time plain colored dress). She is colored in with copics and the grass is with copic marker free hand-saw the technique on a you tube video.
The flower and brad are both from SU. The flowers are available on their clearance rack. I've been hoarding 2 packages. The flower got a little lost so I punched a flower out of old olive to mat it.
The ribbon at the top is also American crafts. I just love when paper and ribbon from the same company go together.
Thanks so much for looking.
Saturday, March 26, 2011
They're Multiplying
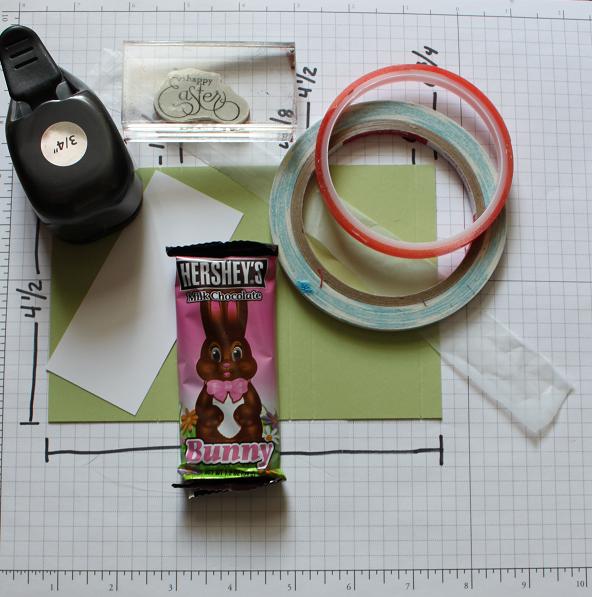
Isn't that what rabbits do...well these guys are so much fun to make that 2 more popped up on my desk today. One even volunteered to be the tutorial model. I've taken several photos to lay out the instructions for you. I hope they all make sense but feel free to let me know if you have any questions. You'll need a piece of CS 6 3/4" by 4 1/2 ". So you can get 2 out of one sheet of standard CS. A word about measurements...DON'T BE SCARED. Your trimmer has marks for 1/16, 1/8, 1/4 and 1/2 and all the combinations in between. When I give you the score measurements I'm going to put in parentheses how I count to figure out the measurement. If it helps each "panel" is 1 7/8 (one eighth less than 2) and each following score is 3/8" (if 2 eighths is one fourth than 3 eighths is one eighth more).
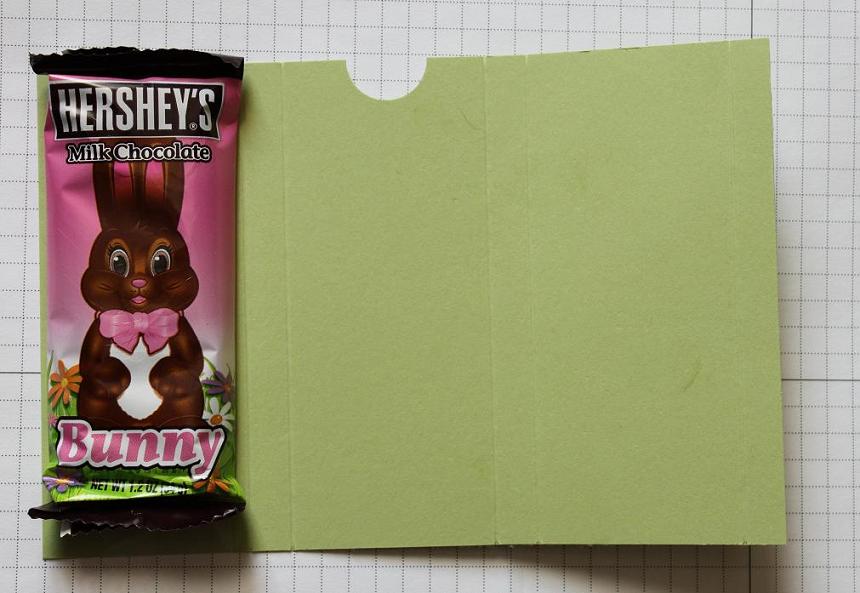
On the long side of your CS score at 1 7/8 the 2 1/4, 4 1/8, 4 1/2, 6 3/8 (one eighth less than 6 1/2) and 6 3/4....see not that bad.
You need to cut about a half inch wide by 10 inch long piece of plastic grocery bag. This is the mechanism.
For more on this it is really helpful to watch Dawn's video. Attach the strip ends to themselves ...here you'll see I used scor-tape but you can use red line tape as well. This is on the first panel you scored. The skinny last piece is on your right. Punch half of a 3/4" punch in the middle panel to be a pull slot.
Attach the chocolate bunny to the far left panel. Glue his "bottom" to the bottom. He should only be attached to the grocery bag. Fold him over on his tummy and attach your message slider. I used a piece of whisper white cut at 1 3/4 by 4". Your message is important so attach it to the TOP (that's just a way to remember where to attach the bunny and the message).
Apply tape to the skinny last bit and make sure it cups over and around the message slider...I always wanted to be a hand model. That's it....decorate the front and stamp your inside message.
I hope you enjoy this tutorial and I hope they bring joy to all who see them.
On the long side of your CS score at 1 7/8 the 2 1/4, 4 1/8, 4 1/2, 6 3/8 (one eighth less than 6 1/2) and 6 3/4....see not that bad.
You need to cut about a half inch wide by 10 inch long piece of plastic grocery bag. This is the mechanism.
For more on this it is really helpful to watch Dawn's video. Attach the strip ends to themselves ...here you'll see I used scor-tape but you can use red line tape as well. This is on the first panel you scored. The skinny last piece is on your right. Punch half of a 3/4" punch in the middle panel to be a pull slot.
Attach the chocolate bunny to the far left panel. Glue his "bottom" to the bottom. He should only be attached to the grocery bag. Fold him over on his tummy and attach your message slider. I used a piece of whisper white cut at 1 3/4 by 4". Your message is important so attach it to the TOP (that's just a way to remember where to attach the bunny and the message).
Apply tape to the skinny last bit and make sure it cups over and around the message slider...I always wanted to be a hand model. That's it....decorate the front and stamp your inside message.
I hope you enjoy this tutorial and I hope they bring joy to all who see them.
Subscribe to:
Posts (Atom)