
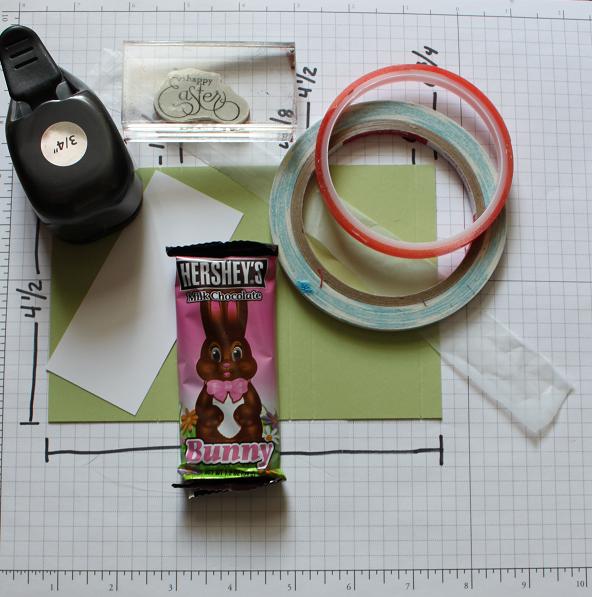
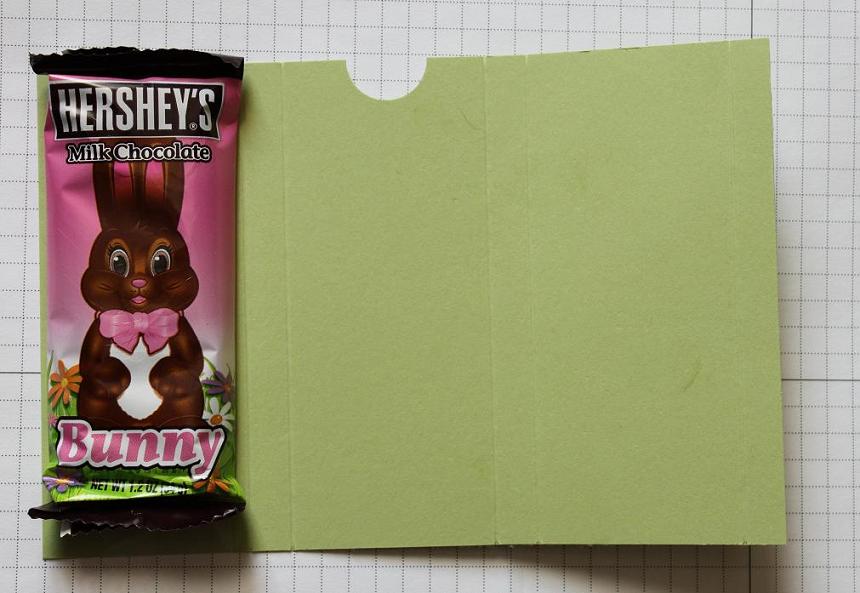
On the long side of your CS score at 1 7/8 the 2 1/4, 4 1/8, 4 1/2, 6 3/8 (one eighth less than 6 1/2) and 6 3/4....see not that bad.
You need to cut about a half inch wide by 10 inch long piece of plastic grocery bag. This is the mechanism.
For more on this it is really helpful to watch Dawn's video. Attach the strip ends to themselves ...here you'll see I used scor-tape but you can use red line tape as well. This is on the first panel you scored. The skinny last piece is on your right. Punch half of a 3/4" punch in the middle panel to be a pull slot.
Attach the chocolate bunny to the far left panel. Glue his "bottom" to the bottom. He should only be attached to the grocery bag. Fold him over on his tummy and attach your message slider. I used a piece of whisper white cut at 1 3/4 by 4". Your message is important so attach it to the TOP (that's just a way to remember where to attach the bunny and the message).
Apply tape to the skinny last bit and make sure it cups over and around the message slider...I always wanted to be a hand model. That's it....decorate the front and stamp your inside message.
I hope you enjoy this tutorial and I hope they bring joy to all who see them.


These are just too cute! Great inexpensive idea for kids to give to their classmate friends for an Easter treat! Thanks for sharing!
ReplyDeleteI thought these Easter treats were one of the cutest I've seen! Did you make the white bunny with punches or was it a store bought die cut? Thank goodness I have enough time to try and make these...I know my friends will be impressed!!!
ReplyDeleteI love them but am having a hard time seeing how it works. Any way you could do a video tutorial?
ReplyDeleteI'm so new at this I'm not sure how to reply back but hopefully this will help.
ReplyDeleteFor Kelly-those are a purchased embellishment if I see them somwhere I'll let you know-I've had them for a couple of years.
For Cindy-check out my post before this one called Herbert Nininger. There is a link to Dawn Griffith's blog and she has a video for a larger candy bar. Hope this helps.